High Volume. High Revenue.
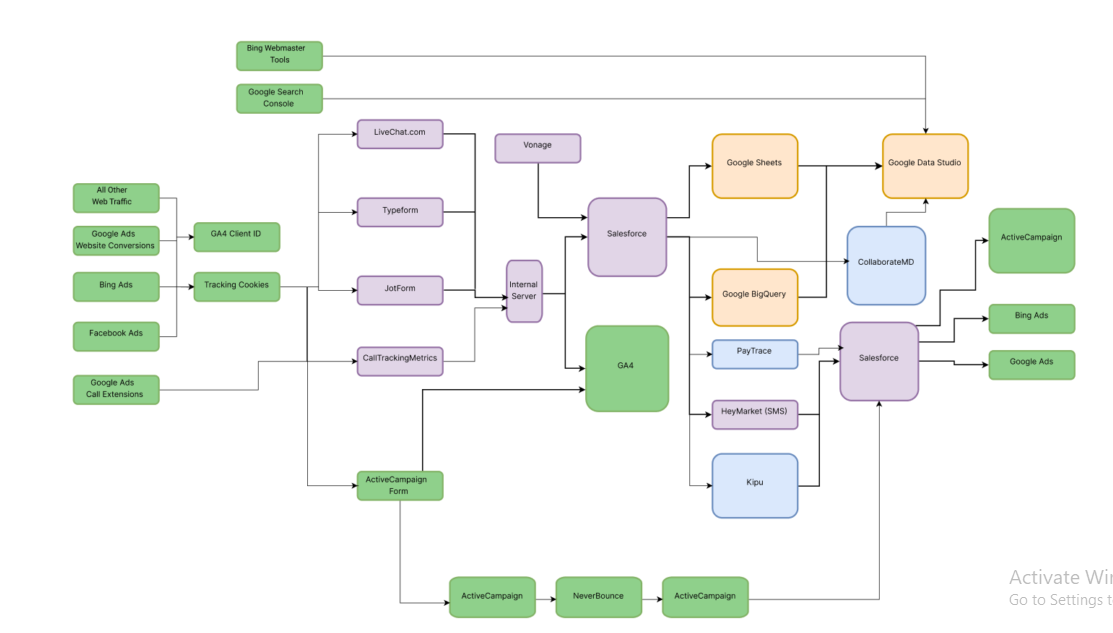
- Integrations
- GA4 Integrations
- Pipedrive Integrations
- Salesforce Integrations
- ActiveCampaign & SF
- Avochato & Salesforce
- Bing Ads & Salesforce
- Bing Ads & SF Offline Conv.
- FB/IG Offline Conv. & SF
- GetWendi & Salesforce
- Google Ads & Salesforce
- GAds Offline Conv. & SF
- Gravity Forms & Salesforce
- JotForm & Salesforce
- Kipu & Salesforce
- LiveChat & Salesforce
- SnapEngage & Salesforce
- Typeform & Salesforce
- Zoho Integrations
- Other Integrations
- CRMs
- Marketing
- Contact us
Set Up Google Analytics 4: Beginner’s Guide
- February 15, 2024
- Online marketing, Tracking & Analytics
In a constantly changing environment, the use of tools that support decision-making and, above all, allow us to be efficient becomes increasingly necessary. One of these tools is GA4, the ally of companies and website owners looking to optimize the performance of their pages. Through different metrics and data, this powerful tool facilitates the work of understanding what users want and don’t want, or what they’re really looking for when they arrive there. Although at first glance, all this sounds good, there are those who are hesitant to use Google Analytics because they believe that its setup requires prior knowledge or experience in the field.
In this basic guide, I intend to show you step by step how to set up Google Analytics and how to verify if the configuration is correct and if the tracking of information is being done. Let’s get started!

What is Google Analytics 4?
It is a powerful tool that provides information about a website’s performance, user engagement and conversion rates.
GA4 basics
GA4 is the latest version of Google Analytics, designed to provide a holistic view of user interactions across different platforms and devices, GA4 also focuses on event-based tracking and incorporates machine learning capabilities for enhanced insights.
Create Google Analytics Account
1. Go to the Google Analytics website and sign in with your Google account.
2. Then, once logged in, navigate to the Admin section and click on “Create Account.”

3. Follow the prompts to enter your website details, such as the account name, website name, and URL.
4. After completing the Set-Up wizard, you’ll receive a tracking ID that you’ll need to integrate into your website.

Setting Up Google Analytics
1. Installing the Tracking Code
- Copy the tracking code snippet provided in your Google Analytics account.
- This code snippet is a small piece of JavaScript that collects data from your website visitors.
- Then, paste the tracking code snippet into the HTML code of your website’s pages, just before the closing </head> tag. You can add the code manually to each page of your site, or use a content management system (CMS) like WordPress to insert it globally across your site.
- Once installed, the tracking code will begin collecting data and sending it to your Google Analytics account for analysis.

2. Set Up Goals and Events (Optional)
Goals and events allow you to track specific actions or conversions on your website, such as form submissions, purchases, or newsletter sign-ups. Here there are the steps to set up goals:
1. Navigate to the “Admin” section of your Google Analytics account and select the appropriate property and view.

2. Then, click on “Goals” and follow the prompts to create a new goal.
3. Events are custom interactions that you define, such as clicks on certain buttons or links. To set up events, you’ll need to add additional code to your website to track these interactions.
4. Setting up goals and events can provide valuable insights into user behavior and help you measure the effectiveness of your website’s content and marketing campaigns.
3. Configure Data Streams
Data streams will help you to collect and organize data from different sources, such as websites, mobile apps, and other digital platforms.
- To set up a data stream for your website, navigate to the “Admin” section of your Google Analytics account and select “Data Streams” under the appropriate property.

- Click on “Add Stream” and follow the prompts to enter your website details, such as the stream name and URL.
- You may need to integrate the data stream into your website by adding additional code snippets or configuring your website platform accordingly.
How To Check If GA4 Is Installed?
After setting up Google Analytics, it’s essential to test and verify that tracking is working correctly. Visit your website and perform various actions, such as clicking on links, submitting forms, or making purchases.
- Navigate back to your Google Analytics account and check the real-time reports to ensure that the data is being collected accurately.
- You can also use the “Debug View” feature (available in Google Analytics 4) to troubleshoot any tracking issues and verify that events and interactions are being recorded correctly.

Install GA4 With Tag Manager
Installing Google Analytics 4 (GA4) using Google Tag Manager (GTM) is a convenient and efficient way to manage your website’s tracking codes and event tags. Below, I’ll outline the step-by-step process to install GA4 with Tag Manager:
1. Sign in to Google Tag Manager
Visit the Google Tag Manager website and sign in with your Google account credentials.

2. Create a New Tag Container
1. If you haven’t already created a Tag Manager container for your website, click on the “Create Account” button and follow the prompts to set up a new container.
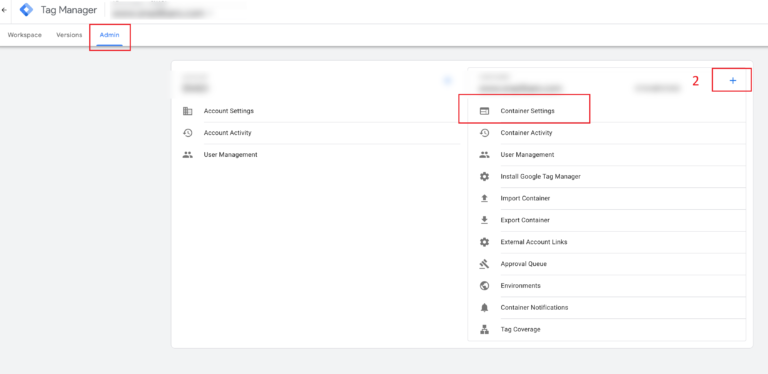
2. Then, enter a name for your container, select the appropriate target platform (Web), and agree to the Tag Manager Terms of Service.

3. Set Up a New Tag for Google Analytics 4
- Once you’re inside your Tag Manager container, navigate to the “Tags” section and click on the “New” button to create a new tag.
- Choose “Tag Configuration” and select “Google Analytics: GA4 Configuration” from the available tag types.

4. Configure GA4 Tag Settings
Next, in the GA4 Configuration tag settings, enter your GA4 Measurement ID.
- You can find this ID in your Google Analytics account by navigating to the Admin section and selecting the appropriate property and data stream.
Optionally, you can customize additional settings for your GA4 tag, such as enabling enhanced measurement features or specifying trigger conditions.
5. Set Up Triggers
Triggers determine when your GA4 tag should fire and start collecting data. Common triggers include pageviews, clicks on specific links or buttons, form submissions, and more.
- Click on “Triggering” and select the appropriate trigger(s) for your GA4 tag. NOTE: You can decide from existing triggers or create new ones based on your website’s interactions.

6. Test Your Tag Configuration
Before publishing your tag configuration, it’s crucial to test it to ensure that it’s working correctly.
- Use the Tag Manager Preview feature to see how your tags look on your website. This allows you to verify that tags are firing as expected and that data is being collected accurately.

7. Publish Your Tag Configuration
Once you’ve verified that your GA4 tag configuration is working correctly, you can publish it to make it live on your website.
- Click on the “Submit” button in Tag Manager and follow the prompts to publish your changes.
Reminder! Add a descriptive version name and description for reference.
8. Verify Data Collection
After publishing your tag configuration, navigate to your Google Analytics account to verify that data is being collected from your website. Use the real-time reports in Google Analytics to monitor incoming data and ensure that events and interactions are being recorded accurately.
In conclusion, once you have set up Google Analytics, all you have to do is start working with all the data. Start to understand what you can use each one for, and most importantly, which ones are the most relevant for your business, those are the ones you should not lose sight of.
Infographic
I have been working in digital marketing for over 10 years, from an intern to Chief Marketing Officer overseeing a $40,000,000 annual budget, advertising in paid search, SEO, television, radio, pay per lead calls, and much more.
About us and this blog
We are a digital marketing company with a focus your entire journey through search - website creation, lead generation, tracking & analysis, & CRM integrations. In this blog we will explain our processes and ideas you can use with your company for better performance.
Request a free quote
We offer professional digital marketing services that help websites improve the performance of their online marketing. Contact us to discuss your website & marketing plans.
More from our blog
See all posts


Recent Posts
- Why you should integrate Jotform to Google Sheets and how to do it February 22, 2024
- Set Up Google Analytics 4: Beginner’s Guide February 15, 2024
- Mobile CTA Optimization: Strategies and Challenges September 11, 2023
All Website Tags

We believe success comes from data-driven, decision-making and connecting as much with the client through their entire journey.
© 2024 Journeys Through Search. All Rights Reserved | Privacy Policy | Terms of Service